The last three AARs posted: "InfantryTryout," "Armour Tryout," and "Izdeshkovo" have all been wringing out "Deluxe," the latest version in Dave Brown's
excellent Battlegroup PanzerGrenadier series of rules for 15/20mm
scale. This AAR's game continues with "Deluxe" and is the
largest game we have attempted so far. As such this AAR is VERY LONG
so if you want to read all the details, bring your lunch! <grin>
Otherwise you can get most of the action from the photos.
Since the last scenario, "Izdeshkovo,"
was a big success it seemed natural to continue on with another from
Robert Avery's excellent campaign scenario book "Vyazma or Bust." I've always wanted to try a scenario with rail tracks
and a railway yard so "Vyazma" fit the bill, not only for
that but the presence of T-35s in the OOB clinched it!

The T-35 (Zvezda) is a huge tank! It is
about 1-1/2 times as long as the T-34 (Old Glory) and it shoots any
two turrets with one fire command! The price on the Zvezda was super
good but I didn't care for the fragile plastic needle MGs so I
replaced them with nails, added a better coaxial MG mount beside the
75mm main gun, then filled the inside of the model with sand/glue
mixture for a bit more heft.
Vyazma
Again the force mix, map, and scenario
conditions were loosely followed, but I added in an additional German
infantry platoon just to ensure the Germans had enough "Schwerpunkt."
The force strengths using the Deluxe points system pegs the German
attack force at 2660 points and the Russian defenders at 1910 points
for a ratio of 1.4 to 1. This seemed about right from previous BGPG
attack scenarios and Deluxe also indicates in large battles the
attacker should have about 500 more points than the defender. With
the Germans having 750 more than the Russians I hoped it would not be
a quick blowout win by the Germans. As moderator and to save game
time I pre-set the on-table forces with tentative Russian defense
positions and a German attack deployment, to be modified by the
players as they wished.
We're getting more familiar with the
Deluxe rules plus our "pet" house rules from Version 2.
For example, we play 1:1 for guns and tanks, use the 20mm ranges for
firing and activation, and replace BUA terrain with individual
buildings and call them "small terrain features." Those
plus a number of little "tweaks." We played on a 5x4 table
with a game length of 12 turns and a variable ending. For this early
war scenario we continued to have all Russian rifle squads fire as
one section (no LMGs) while all the German rifle squads fire as two
sections due to their inherent MG34s. This to model the 1941 Russian
shortage of LMGs.
Briefing
It is October 1941. Panzer Group III
under Hoth, part of Heeresgruppe Mitte (Army Group Centre), has
fought through Izdeshkovo and has just arrived at the outskirts of
Vyazma, the gateway to Moscow for Operation Teifun. The 87th Infantry
Division with panzer support from Panzer Group III, has been tasked
with quickly capturing the railway yard on the outskirts of Vyazma.
The railway yard is required to rapidly deploy troops and armour for
the final assault on the centre of the city.
Comrade General Timoshenko on the
Bryansk Front has conscripted the citizens of Vyazma to prepare
defenses nearer the city centre. To buy time lead elements of 16th
Army supported by heavy weapons and tanks, which arrived three days
ago, were ordered to dig-in with a forward defense at the edge of
Vyazma with orders to hold up the German advance as long as possible.
Tim (Kapitan
Milleschev) takes the Russian side and Brent (Hauptmann Pollockstein)
and Rick (Hauptmann Von Lowellberg) take the German side, while I
moderate.
Map and Russian Force (Kap.
Milleschev)
Elements of 16th
Army (Inexperienced)
BGHQ
Artillery
Observer (4 Off-Board fire missions - 4x 76mm guns)
Sniper*
(1x) * classed as Elite
Entrenchments (21x)
#1
CoHQ (Kommissar, 1x AT Rifle Team)
Rifle
Plt (Command, 2x Rifle Squads, 1x Tank Killer Squad)
Rifle
Plt (Command, 2x Rifle Squads, 1x Tank Killer Squad)
#2
CoHQ (Kommissar, 1x AT Rifle Team)
Rifle
Plt (Command, 2x Rifle Squads, 1x Tank Killer Squad)
Rifle
Plt* (Command, 2x Rifle Squads, 1x Tank Killer Squad) *No ammo! -
Can only Close Assault!
Medium
Machine Gun Plt. (Command, 4x Maxim MMG Teams)
Anti-Tank
Plt (Command, 2x 45mm AT Guns)
1st
Armour Plt.* (Command KV-1, 1x KV-1) * Classed as "Inferior"
2nd
Armour Plt.* (Command T-34, 2x T-35) * Classed as "Inferior"
(Special Rule: When activated on a
Tactical Move and Fire Order a Tank Killer squad can move, place
smoke 3" away, and close assault tanks with +1 DRM. In
addition, each Tank Killer squad has 1 Molotov = +2 DRM)
The Russian forces
are required to deploy east of the North/South road. The map below
shows the Russians dug-in at their positions, all Hidden and with the
sniper Ambush Camouflaged. When Kapitan Milleschev arrived to take
over command he found his Kommissars had already ordered his troops
dug in with an organized defense and he adopted the defense plan "as
is." His Kommissars explained that the 4th infantry platoon has
been held back in the railway yard because there was only enough ammo
for 3 platoons! The 4th can only Close Assault! Since the armour is
all within LOS of the German deployment, they are not Hidden.
However, they were not placed in their positions on the table until
after German deployment.

The woods are Difficult Terrain. The
stone walls, hedges, and fences are all of low height, do not
block LOS and offer a -1 LOS hindrance or -1 Cover to fire at
infantry, guns, and AFVs (stone walls = -2 Hard Cover). The crops are
stubble, providing no LOS hindrance or Cover. Entrenched troops and
guns behind a stone wall can only claim one Cover DRM since their
trenches are mainly for artillery & air strike protection. LOS is
3 inches between units within Woods and automatic spotting of Hidden
squads the same 3 inches (for
some unknown reason we used 4 inches in Turn 1??).
The buildings are a mixture Russian rural village wooden buildings
offering Cover, and stone or brick offering Hard Cover.
Kapitan Milleschev
has positioned himself and his CoHQs (Kommissars) within contact
range of their platoon commanders. Division Command believes the
German objective is determined to take Vyazma quickly so Milleschev's
orders are to stop the German advance toward the city centre to buy
time for construction of defenses to the rear. Significant armour
support has just arrived.
German Force (Hpt. Von
Lowellberg and Hpt. Pollockstein)
87th Infantry Division (Regular) &
support by Panzer Group III (Regular)
BGHQ
FAC Observer (4x Air Missions -
Stuka Air Support)
#1 CoHQ (1x AT Rifle Team)
Rifle Plt (Command, 3x LMG squad,
1x 50mm Mortar)
Rifle Plt (Command, 3x LMG squad,
1x 50mm Mortar)
Mortar Plt (Command, 3x 81mm
Mortar, 1x Mortar Observer)
#2 CoHQ (1x AT Rifle Team)
Rifle Plt (Command, 3x LMG squad,
1x 50mm Mortar)
Medium Machine Gun Plt. (Command,
3x Tripod MG34 Teams)
Infantry Gun Plt. (Command, 2x 75mm
Inf. Guns, Observer, 2x Trucks)
AFVHQ *(Befehlswagen)
Pioneer Plt *(Command, 2x Assault
SMG Squad, 2x Flamethrowers, 2x SdKfz251/1+LMG)
Medium Panzer Plt.* (Command
PzIIIH, 3x PzIIIH)
1st Heavy Panzer Plt.* (Command
PzIVE, 1x PzIVE)
2nd Heavy Panzer Plt.* (Command
PzIVE, 2x PzIVE)
*from Panzer Group
III.
(Special Rule: The Pioneer squads have
the same attributes as the Russian Tank Killer squads, each with 1 AT
Mine = +2 DRM. The flamethrower fires separately)
Hpts. Pollockstein
and Von Lowellberg have orders to secure the railway yard and
must deploy west of the North/South road.

The terrain to the north has woods and
heavier buildings, so the German company commanders decide to deploy
their troops to the more open south. Hpts. Von Lowellberg and
Pollockstein arrive to issue final orders and they adopt
their attack deployment "as is." All German units
are visible on the table, in LOS of hidden Russian units (the
mortar battery and observer, the two 75mm infantry guns, and the FAC
should have been Hidden).
The map below
shows the overall German deployment.

Hpt. Pollockstein's
south force that intends to clear the railway and south hill
before attacking the railway yard from the south.

Hpt. Von
Lowellberg's northern force that plans to attack in the centre to
clear any Russian resistance there before attacking the railway yard
from the west.

The
FAC takes up a centre position with a reasonably good view of the
battlefield (leaning
against the building to represent being inside it).
As the troops move into final position they hear the roar of Russian
tank engines. The FAC reaches for his radio phone...
Game Play
Turn 1
The
Germans win initiative. Hpt. Von Lowellberg requests the FAC to call
in a Stuka attack on the nasty KV-1s, but the Luftwaffe Control says
they are busy elsewhere. To provide some temporary cover, the 3-tube
81mm mortar battery, the 2-gun 75mm infantry gun battery, and all the
PzIVs place smoke. (House
rule: Certain German (eg. PzIV), British, and U.S. AFV main guns of
75mm or better may lay smoke on any terrain point in LOS. Only
firing DRMs are used (range, LOS hindrances, Tactical Move &
Fire). A one-gun template of smoke is placed on target for a score
of 7 or better. If 6 or less, use 1d4 die to determine undershoot on
1-2 or overshoot on 3-4 with deviation distance of 1d4.)
Only one round of smoke is available to each PzIV so this is the
last smoke from them! Hpt. Pollockstein has the PzIVs advance after
firing, one straight down the road toward the KV-1 that fails to
activate to Defensive Fire. However a Russian squad is discovered
and the 50mm mortar scores a direct hit, causing the squad to
Disengage. The 1st Rifle plt and the PzIV plt of the southern force
advance without further incident.

Pollockstein has
the rest of the south force just advance with the loaded Pioneers and
2 PzIIIs angling north to stay out of LOS of the KV-1 peeking out
behind the building. No Defensive Fire. The Russians in their
trenches are being cagey, waiting for Close Range before wasting
valuable ammo.

To
the north the troops recon the woods with poor results. The infantry
advance and secure the stone building as a base for an attack on the
woods. Again no Defensive Fire. The PzIVs move up behind the behind
the the smoke screen and the central barn, out of LOS of the T-35 and
the KV-1. However, two PzIIIs move over toward the woods. The first
one meets Defensive Fire from the T-35 that can shoot any two turrets
with one activation! Constant double fire! The T-35 suppresses the
lead PzIII (the
yellow bead is hidden)
and the second PzIII pulls in behind to get Hard Cover while it
attempts a return shot at the T-35, which misses. This ends the
German Command Phase.

In
the Russian Command Phase, Kap. Milleschev first orders his artillery
observer to call in an artillery barrage, and it is successful and on
target. The full barrage lands on the Pioneers in their halftracks,
but a number of other infantry squads are caught in the open. The
FFE effect roll is a 10! This Disperses a German Anti-Tank Rifle
team and a Light Mortar team, plus causes one halftrack full of
Pioneers, and two infantry squads to Disengage. (We
were testing out the new artillery effects table in Deluxe and still
feel that it is still too subject to the vagaries of a single die
roll for all stands under the template. We'll return to our house
rule of a separate roll for effect for each unit.)

Next the T-35 by
the rail yard activates and takes a couple of shots at the lead PzIII
but both miss. Then the KV-1 platoon activates. Inferior tanks are
not hampered if they are stationary and the target is in effective
range and in their reduced Arc-of Fire. One KV-1 takes a bead on the
second PzIII for a side shot and smokes it! Those big 76mm guns hit
hard against '41 armour!

In the south, the
second KV-1 fires on the PzIV on the road, hits and causes it to
Disengage. That's all the Russian wishes to do this phase, still
staying hidden, keeping the German guessing.
In Deluxe's new
Exploit Phase, since the German has Initiative, they have 4 Exploit
Orders. For the first order Hpt. Pollockstein activates the south
rifle platoon and MMG. They move into new firing positions in the
south building and the vacated Russian trench in the garden. One
squad moves toward the hill and discovers a Russian squad. Since no
Defensive Fire is allowed, the now exposed Russians can only watch
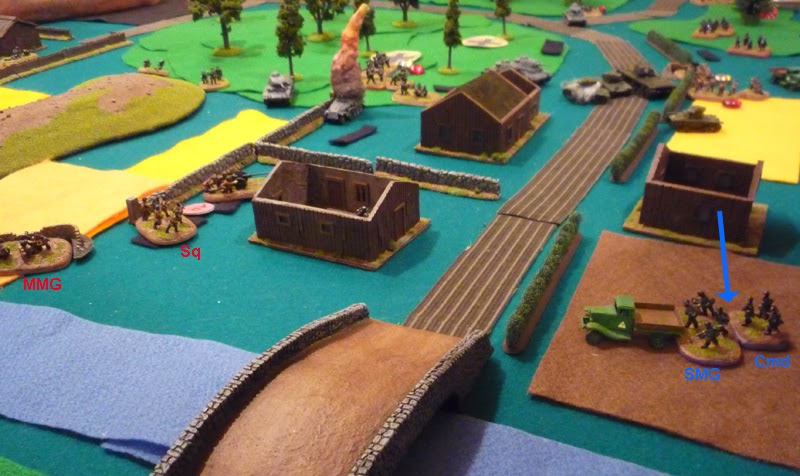
helplessly.

The second Exploit
Order activates the Pioneer's lead halftrack to move up beside the
PzIVs.

The third order
has Hpt. Von Lowellberg activate the infantry platoon to move toward
the woods hoping to discover some hidden Russians without fear of
Defensive Fire. One Russian squad is discovered and instead of
having the satisfaction of opening fire has to politely wave at the
Germans.

(After
seeing the effect of these Exploit moves we decided that the Exploit
Move Order should only be allowed as a Withdraw Order. Using it to
cross an enemy fire-lane or discover hidden enemy troops without any
risk just didn't work for us.)
The
last Exploit order is used to promote a PzIII to platoon leader since
their commander was destroyed by the KV-1. In the Morale Phase all
the German suppressed units rally except for a PzIV and PzIII. The
Russian squad in the double building Routs! Then the rolls for smoke
dissipation result in about half of it remaining.
(We use Version 2 rules where smoke can possibly stay for up to two
game turns and roll for dissipation at the end of the first enemy
Command Phase after the friendly Command Phase in which is is placed.
All the remaining smoke on the table will come off at the end of the
next Russian Command Phase.)
Here is the map at
the end of Turn 1.

Turn 2
The Germans win
Initiative on a draw! The FAC radios for a Stuka strike and Air
Control says it's on the way! The pilot dives on a KV-1, lining his
flight path on a second KV-1 in case he overshoots, but it is a Near
Miss! A scatter die shows the deviation direction and a 1d6 roll is 5
inches for distance. This moves the template to the left side and
completely away from the KV-1 so the bomb explodes harmlessly.

(Major
Goof! After Turn 2 was almost over I remembered that in all the air
strikes in our previous Version 2 games a scatter die was not
allowed, instead the rules used the accuracy roll to also provide the
deviation, which was only along the direction of the flight path, not
to the side. Further, the new Near Miss Deviation Table in Deluxe
using a 1d6 die roll provides a more realistic hit probability
"envelope" than Version 2 and we have adopted that Table
for both air attack and artillery deviation instead of using the
Version 2 rules. So the scatter die should not have been used to stay consistent. As moderator responsible, I made
reparation later in the game by allowing this Turn 2 air attack to
continue to be played correctly from the point of error just before
starting Turn 3. The attack will use the already rolled 2d6 Near Miss
result and the already rolled 1d6 = 5 for deviation direction on the
Near Miss Deviation Table and will be resolved from there. Reparation
was needed since 1/5 of the German attack strength is in Stuka
strikes, so just overlooking this error would not be fair.)
Unhappy with the
results of the air strike, the Germans try to activate their 81mm
mortar and 75mm Infantry gun batteries. Both activate and but both
roll "Say Again" for accuracy and are lost! That's 3
strike-outs in a row for the artillery & air support! Lady Luck
is not kind at times.
Hpt. Von
Lowellberg activates the north platoon and begins to move a squad in
the field toward the Russian squad, but is suppressed by Defensive
Fire. A second squad begins to move and another Russian squad reveals
itself and Defensive Fires with a hit, but the squad rolls a 12 on
Morale and goes Berzerk! (takes the extra 6 inch reaction move
option). The Berzerker Close Assaults the Russian but is Dispersed,
merely suppressing the Russian.

The last squad
moves (photo above) and comes under close range fire from another
newly revealed Russian squad and an AT Gun, Dispersing the German
squad. The German mortar and MMG near the stone cottage, plus the MMG
in the woods all miss. A classic example of advancing in the open
and meeting close range fire from an entrenched enemy. The German
platoon is down to one suppressed squad now!
In the south Hpt.
Pollockstein issues a Move & Fire order to the infantry platoon
and MMG, and has the MMG and squads fire at the Russian squad on the
hill, Dispersing it. The infantry platoon then moves along the hill,
bumping into a Maxim MMG lost in smoke, causing an immediate Close
Assault and also revealing a nearby AT Gun and command. The German
platoon easily eliminates the MMG. Then the PzIV platoon slowly
moves up behind the infantry.

The PzIIIs
activate next and one fires at the AT Gun on the hill causing it to
Disengage. The other PzIII starts to move but fire from the KV-1
causes it to Disengage.

Meanwhile in the
north, Hpt. Von Lowellberg activates the PzIV platoon and moves them
north out of LOS of the deadly KV-1, discovering a Russian squad near
the stone wall at the same time the T-35 fires with both the 45mm and
short 75mm turrets, plus the T-34 fires, suppressing the PzIV.

The second PzIV
circles around, crashes through the stone wall and Close Assaults the
Russian squad causing it to Disengage and retreat.

Further south Hpt.
Pollockstein activates his second platoon, moves one squad into the
barn, but while moving the second squad from the crop, up pops a
hidden Maxim MMG and Disperses the squad! Then the platoon command
moves up near where the squad was ambushed and the third squad moves
up the tracks.

The Pioneer
platoon activates and the lead halftrack crashes through the hedge
looking to advance and dump it's load of Pioneers to wreak havoc on
the KV-1. But their plan is seriously interrupted when a squad and
AT Rifle team ambush them in the garden, with a good shot from the AT
Rifle causing them to Disengage back alongside the cottage.
Meanwhile the other halftrack advances to the hedge and it's LMG
fires at the squad but misses.

This ends the German Turn.
The Russians begin
their turn with another heavy artillery bombardment that arrives on
the building to the left shown above. The Germans catch a break and
the only unit that is affected is the halftrack that Disengages.
Then the MMG opens
up, Dispersing a German Platoon command caught in the open, while a
nearby squad misses the German squad on the tracks. After that
Kapitan Milleschev activates the KV-1s and orders one to try a shot
at the PzIV on the stone wall, but it misses.

The second KV-1 is
more successful, Damaging a PzIII by the south road and it retreats
behind the building. In the battlefield centre near the barn, a
platoon commander (still hidden) issues a Rally order, but the squad
behind the hedge fails and the one in the woods Routs! The Russian
squads and AT Gun to the north fail to activate, and the T-35 and
T-34 fire and miss the PzIV on the stone fence. End of Russian turn.
In
the Exploit Phase, Hpt. Von Lowellberg withdraws the PzIV off the
stone wall to behind the building, out of LOS of the KV-1. Hpt.
Pollockstein withdraws both Pioneer halftracks, and promotes an NCO
from the squad in the centre barn to form a new platoon commander.
(House
rule: Replacing a Dispersed platoon commander with a squad seems too
high a platoon cost, the loss of a squad's full firepower. We play
that an
eliminated platoon commander is counted as a casualty for Breakpoint.
At promotion time, the platoon command squad is placed near a
platoon squad with a marker that indicates "Replacement"
causing -1 DRM to activate. The squad takes a Damage marker to
indicate loss of men transferred to the platoon command squad
resulting more fragility and -1 DRM when that squad fires
individually.)
In the Morale Phase all German suppressed units rally except for a PzIV, a PzIII, and one squad. The Russian AT Gun rallies but the squad at the hedge fails. This ends Turn 2.
Before beginning Turn 3 the Stuka
attack that was resolved incorrectly at the start of Turn 2 is
completed from the point of error. The
original attack was from the north so the template was again placed
on the north KV-1 with flight path lined up on the second KV-1. The
accuracy roll is the already rolled 2d6 Near Miss result and the
already rolled 1d6 = 5 is used for the deviation direction on the
Near Miss Deviation Table. A 5 on the Near Miss Table is Overshoot
1d6. The Germans now roll a 1 and the template moves south by 1 inch,
covering the KV-1 and a hidden CoHQ!

The
FFE roll plus Stuka DRM for the KV-1 is 10 for a suppression test
which the KV-1 passes, but the second roll for the CoHQ causes it to
be Dispersed!
Here is the map at the end of Turn 2
(revealed Russians - red dot).

Turn
2 was tough for the Germans who have so far lost 6 units to the
Russians 4!
Turn 3
German Initiative again. The
FAC radios for another Stuka attack but there is no response. Hpt.
Pollockstein fires FFE with the mortars at the Russian infantry in
the centre, but the shot deviates and is harmless.

The action with Hpt. Von Lowellberg
in the north for Turn 3 is all ineffective! The infantry gun
battery, both MMGs, the infantry in the stone cottage, and the PzIVs
all missing their shots. One PzIV is suppressed by a T-35 during
it's move.
In the south, Hpt. Pollockstein has one
squad move up into the trench on the hilltop to fire into the flank
of the Russian infantry in the centre. The KV-1 fires and misses
(Inferior Tank) and the squad also misses. Then a PzIV moves forward
to Overrun the Russian platoon command, winning the close assault but
ends it's move early becoming suppressed while the Russian platoon
commander Disengages due to double suppression. A PzIII fires on the
AT Rifle Team forcing it to Disengage back into the building.

After that the Pioneers in their
halftracks Rapid Advance up behind the PzIV. The remaining
activations in the centre all roll Command Confusion! This ends the
German turn.
On the Russian turn, Kap. Milleschev
calls for artillery on the infantry massed around the stone house but
is unable to contact the battery. Next a KV-1 activates and fires on
the German infantry on the hill, the big 76mm shell Dispersing one
squad and suppressing another. (Sorry, no
photos for the Russian Turn 3) The infantry platoon & AT
Gun in the north both fail to activate and the MMG in the centre
fires with a Double 1, earning Low Ammo. The T-34 Platoon activates
with both T-35s moving up and the T-34 taking up a flanking position
behind the woods. The T-35 on the north road Disperses the German MMG
near the infantry gun battery. Finally, the AT Gun on the south hill
pings a shot off the suppressed PzIV. End of Russian turn.
In the Exploit Phase, with four German
orders, the PzIII by the garden pulls back by the house, another
PzIII pulls back behind the hedge, two exposed infantry in the centre
pull back to the south house, and the infantry on the hill move back
over the crestline out of LOS of the deadly KV-1.
During Rally Phase, all German units
rally except for the PzIV on the hill and the PzIV on the road.
Plus, in another blow to the Germans, a PzIII at the rear decides to
Rout! All Russian units rally except for the AT Rifle Team.
Here is the map after Turn 3 (revealed
Russians - red dot).

Turn 4
German Initiative. Hpt. Von Lowellberg
continues to roll just awful for activations, starting with "lost
radio contact" by the FAC so no Stuka strike this turn either.
Then both the 81mm mortars and the 75mm infantry gun batteries roll
Command Confusion! At least the north infantry platoon activates and
the MMG suppresses a Russian squad in the woods. Then the PzIVs
move, the AT Gun fails to activate for Defensive Fire, and they fire
on the AT Gun causing it to Disengage.

Down south Hpt. Pollockstein doesn't
fare much better when rolling for activation with his platoon of
PzIVs rolling Command Confusion. But the PzIIIs activate and
suppress the T-35.

Then the Pioneer halftracks move up,
the first met with accurate AT Gun fire, Disengaging it. The second
halftrack unloads and the Pioneer squad moves near the AT Gun then
fires. The flamethrower toasts the AT Gun!

(Deluxe allows a squad to disembark, perform a tactical move including Close Assault but Fire is not allowed. House Rule: We allow the squad to Fire or Close Assault at the end of their move). This ends the German turn.
The Russian turn opens with a failed
request for artillery. Then one KV-1 attempts to activate separately
but rolls Command Confusion. The other one is successful and
repositions onto the south road. In the north, there is much better
luck! The T-35 Disperses the 75mm battery commander, a squad in the
woods suppresses the MMG in the stone cottage, and the squad by the
hedge Disperses the German squad in the centre barn.

This ends the Russian turn. In the
Exploit Phase, the German side first moves a "spare"
platoon command in the centre rear, north toward the leaderless 75mm
battery. Then the AT Rifle moves into the woods near same battery.
After that the FAC moves south to better observe the KV-1s. Lastly,
The 81mm battery commander repositions to see the KV-1s.
In the Rally Phase the T-35 Routs! All
other units rally except for the Russian AT Rifle Team and the German
PzIV behind the hill. Here is the table after Turn 4 (revealed
Russians - red dot).

The Russian left flank is still being
held by the KV-1s which are a powerful deterrent! Both sides are
taking losses and will soon be rolling for their 25% Breakpoint Test!
Turn 5
Russian Initiative! Kap. Milleschev
calls in a heavy artillery strike right on the stone cottage. This
results in Dispersing the CoHQ, the light mortar team, and one PzIV,
plus suppressing the two other squads there! Three units lost
including a tank! A disastrous FFE for the Germans! To add more to
the blow, the nearby Russian squad in the woods then fires on the
suppressed MMG causing it to Disengage. Since it was already
suppressed it is Dispersed!

The T-34 and T-35 (photo above) move up
the road toward the 75m infantry gun battery, the PzIV and T-34
exchanging shots with no effect, but the T-35 blows up a truck!
(trucks aren't combat units so don't count toward Breakpoint,
however, Kap. Milleschev certainly had fun doing it!)
In the south the KV-1s activate and
pull back a bit, then blow the light mortar off the hill into
Neverland. The platoon command by the hill decides to double time
it back to the east house.

This ends the Russian turn. Four more
German KIAs!
To start the German turn, the German
Air Command finally answers the radio and a Stuka attack screams down
right on target, this time catching both KV-1s. However, with a
double 1 and a 6 roll + 3 DRM = 9 , only one KV-1 takes a Suppression
Test which it shrugs off. The results of air attacks against armour
have not been a factor in the game so far.

The 81mm mortar battery now activates
and places smoke on the north KV-1. Meanwhile up north Hpt. Von
Lowellberg activates the PzIV to
fire at the T-34 and misses. Hpt. Pollockstein also activates his
remaining two PzIIIs, moving the north one up for a shot at the T-34,
but the T-34 Defensive Fires and the PzIII is Destroyed!

Continuing in the
north (photo above) Von Lowellberg activates the squad in the stone
cottage to fire at the Russian squad in the woods, getting a
Disengage Test and on a low morale roll becomes Dispersed! After
that he activates each 75mm Infantry Guns separately as uncommanded
units. The first Infantry Gun moves up to the edge of the woods and
fires at the T-35 but misses, but the T-35's Defensive Fire doesn't
and causes the gun to Disengage back to the remaining truck. The
second gun repositions and fires at the T-35 and suppresses it!
Back in the south,
now that the KV-1 is masked by smoke, Hpt. Pollockstein's other PzIII
that previously activated Overruns the pesky MMG in the centre that
has been such a thorn and eliminates it, but the PzIII becomes
suppressed.

Hpt. Pollockstein now opens up a "do
or die" attack in the south which unfortunately results in the
latter! First the PzIVs activate and as the first one moves up the
road it gets destroyed by Defensive Fire from the KV-1 outside the
smoke. The second PzIV moves up and bounces a shell off the KV-1s
front armour. Then the infantry platoon in the house Rapid Advances
into Close Assault with the Russian platoon commander in the double
building. However, only one squad has enough movement to get to the
building so it is one on one. The Russian platoon commander is
fearsome and Disperses the squad, at a cost of becoming suppressed.

Next the Pioneers on the hill (photo
above) attempt to activate to run up and hose down the KV-1 with
their flamethrower, but roll Command Confusion! Gak! For the next
round, the squad on the hill activates as an uncommanded unit and
Rapid Advances in a suicidal charge on the KV-1 in the smoke. The
squad is dispersed, but manages to suppress the KV-1. Lastly the
remaining Pioneer squad in the rear activates and moves up to the
trench at the top of the hill.
This ends the German command phase.
The Russians have two orders in the Exploit Phase. The first has the
KV-1s pull back 6 inches and, due to a possible breakthrough in the
Russian left flank if a Stuka gets lucky, the second uses Hidden
Movement to move the BGHQ from the south stone building in the
railway yard to the centre building.
During the Rally Phase, all the German
units rally except for the platoon command at the stone cottage. All
the Russian units rally except for the AT Rifle Team and the platoon
command in the double building.
Both Russian and German sides are over
their 25% Breakpoint! Both sides roll a 6 requiring all suppressed
units to fall back 12 inches. The Germans lose one more unit this
way as the platoon commander in the stone cottage withdraws off the
table. The Russian platoon commander and AT Rifle Team in the double
building withdraw back beside the KV-1s.
Here is the table at the end of Turn 5
(revealed Russians - red dot).

This was a very costly turn for the
Germans in lost units! The Germans are now dangerously close to 50%
Breakpoint!
Turn 6
German Initiative. Hpt. Von
Lowellberg requests the FAC to radio in for a Stuka strike and makes
contact! The JU87 arrives to attack the cluster of KV-1s and
infantry and is dead on target. But the bomb completely misses the
first KV-1 and only causes a suppression test for the second one,
which it easily passes. The bomb also misses the platoon commander
but scores a direct hit on the AT Rifle Team, Dispersing it. Once
again Air Support has failed to come through against enemy armour!

Hpt. Pollockstein
activates the mortar battery to fire FFE on the newly discovered
Russian squad but it overshoots and completely misses. Then he
activates the platoon in the garden. The commander and squad move
into the west end of the double building, while the mortar observer
stays just outside. The squad fires on the Russian squad and misses.
The CoHQ also moves up by the building. After that the Pioneer
platoon advances across the road toward the double building under
cover of the smoke screen in front of the KV-1s. One squad moves
into the east end of the building but the other can only make it as
far as the road.

Hpt. Pollockstein now has the MMG in
the west building fire on the Russian squad but misses. Then he has
the PzIV platoon move, one tank moves to a hull down position at the
crest of the hill, fires at the KV-1 and misses. The return
Defensive Fire from the KV-1 also misses. The second PzIV fires on
the Russian squad for a suppression test which the squad passes.

Meanwhile, on the north flank, Hpt. Von
Lowellberg activates each Infantry
Gun individually. The first fires at the T-34 causing it to
Disengage! The second fires at the T-35 and misses. With the T-34
neutralized, the PzIV moves up just into LOS of the T-35 and stops to
fire, firing before Defensive Fire. The T-35 is Damaged and
retreats. The way is now open for the squad in the stone
building to advance to the woods, so it quickly races forward to the
tree line. Lastly, a "spare" platoon command runs toward
the Infantry Guns to take over command of the battery. At last some
German fire against armour is effective!

The German turn ends right after the
BGHQ and AFV HQ move up closer to the action.
On the Russian turn, Kap. Milleschev
requests an artillery barrage and it arrives on schedule, on target,
right on the double building that the Pioneer and grenadier platoons
were taking cover in. Again it was carnage with one Pioneer squad
and one grenadier squad Dispersed and both remaining platoon
commanders suppressed.

Hpt. Milleschev now activates the KV-1
platoon to fire. The north KV-1 fires on the PzIII near the tracks
causing it to Disengage. The south KV-1 fires on the PzIV hull down
on the hill and with a good hit, Destroys it!

This sudden series of German losses
pushes the German side to it's 50% Breakpoint and suddenly the game
ends in an automatic Russian win!! Kapitan Milleschev receives a
commendation from Division on winning his battle which buys time for
the defenses nearer Vyazma's centre to be strengthened.
Here is the table at Game end (revealed
Russians - red dot).

Tallying Up The Score:
The Russian side lost 11 units out of
36 and the German side lost 25 units out of 49.
Comments on The Game:
The outcome of
this scenario, an German attack over fairly open terrain toward a
prepared, dug-in, and hidden enemy, and unsuccessfully supported by
air strikes, probably was pretty historical. The attacker needs some
form of advantage to succeed, either far more ground troop strength
or good off-board artillery/air support for both FFE and smoke
screens.
The force strength for each side was in
line with previous scenarios where the attacker won, so that didn't
seem to be the problem. In fact I gave the German side an extra
platoon of infantry over that defined by the original scenario OOB.
In this "Vyazma" game the German attack failed primarily
due to lack of effective Air Support against the Russian KV-1s. The
Stukas showed up 3 times (about average), dropped their bombs
"on-target", but only managed to achieve two, repeat two,
suppression tests, which were both passed! Bad luck on these critical
air attack rolls caused the German ground attack to stall. The 530
points spent for Air Support, most of the advantage in total strength
points for the German, were essentially wasted, putting the Russians
closer to parity with the attacker in strength points on the ground
(not a good attack plan!). After the game the German players
indicated they would rather have used the points for an off-board
artillery battery for more smoke screen and FFE capability and an
extra platoon of infantry instead! However, one or two good dice
rolls against the KV-1's still could have been a game changer! As an
aside the double fire capability from the T-35s was quite effective!
In hindsight, my initial German
deployment of forces could have been better planned to promote an
attack in a more concentrated area for a better "schwerpunkt."
And holding some of the force back as reserves to come on in later
game turns. It would have been interesting to use the Exploit
Reinforcement order for this! Also I could have switched one infantry
platoon to say motorcycle recon troops to give more opportunity to
recon for hidden enemy.
As for the luck factor, in general both
sides agreed that the Germans generally rolled somewhat poorer than
average, particularly on critical rolls, while the Russian generally
rolled a little better than average, particularly on morale saves and
artillery strikes. (The Russian artillery was awesome!)
Comments on Deluxe
We feel we have explored the depths of
Deluxe over our last four games. The BGPG game system still remains
as our "go to" set of rules for reinforced company and
battalion level actions. However, Deluxe seems to have somehow moved
a notch away from the sweet spot we enjoyed with Version 2. It's
definitely more complex than Version 2 mainly due to the need to
activate a Combat Group for Defensive Fire and to remember the
nuances of how they interact with phasing Combat Groups when moving
or Close Assaulting. Also from the subtleties of command authority
with uncommanded Combat Groups. These additions plus the new Command
Confusion (pegged at 4 - activation fails 1 in 6 tries) have very
slightly lowered the "fun factor" and also lengthened our
game session times out to longer than we wish.
As I discussed at the end of the last
Izdeshkovo scenario, some of the new rules introduced in Deluxe
indicate a move toward more "realism," toward the skirmish
level which we like (eg. more fire DRMs, turret facing, etc.),
however, some of the changes seem
to be moving the opposite way, toward the more "abstract"
end (eg. the Exploit Move Order). For us this means that Deluxe is
not quite as consistent as Version 2.
On the other hand, we really like the
new matrix driven Fire and Close Assault Tables, plus improvements in
the game mechanics like more order choices, national differences,
turret facing, crew quality, Fog of War Blinds, and a better
artillery deviation table. We do miss some of the "spice"
that Version 2 provided that was lost in Deluxe like the DRM
modifiers for artillery accuracy, smoke possibly lasting 2 turns,
variable tactical movement rate, and ability to fire and recon during
a tactical move.
The Combat Edition of Deluxe (no
pictures) is very much appreciated during game play and shows the
author is thinking about ease of use during game play. Dave Brown
has obviously spent a lot of time on Deluxe and can be proud of his
achievement! Appreciation of any set of rules is always completely
subjective based on each of our our individual game tastes and our
own unique interpretation of a realistic "fantasy battle."
The nice thing about it is, if enough of a rules set hits your sweet
spot, you can "tinker" with the rest, "tweak it"
to make it sit up and bark for you and your gaming group.
So where does this leave us? I expect
we will shuffle both Version 2 and Deluxe into a single "play
deck" and use that for our future games. Maybe we'll call it
Version 2.5, or as Hpt. Pollockstein suggested, perhaps Version 2D!
Thanks to those of you who hung in to
read this far! Hope you enjoyed this AAR. What's next? Actually
the usual seasonal interlude is up next as Gary's Command Post goes
into the usual holding pattern for the summer. Snow is melting,
birds are all "atwitter", the clouds are fluffy white
again, and my little cabin by the lake is calling me. For rainy
days I'll have some little figures to paint and these rules to
"tinker" with. See you in October!
Later...
Gary